Sunday, September 30, 2012

Sewing School -- Part II

I very often have people asking me to help them add straps to a dress.  Many formal dresses come with optional spaghetti straps, but many less formal dresses don't.  And those spaghetti straps are silly anyway - they don't add anything toward the look of the dress!
Here are some ideas for adding straps on a strapless dress...

a simple white strapless dress

A small ribbon attached in the center and tied behind the neck adds a little support, but not a lot more coverage

A little more coverage is given with a fairly wide piece of fabric (this works really well with sheers like chiffon or tulle) in a ruched halter style --       
                                 attached just in front of the arms                           or spread across the entire front

 Try two wide strips of lace
 straight across the shoulders
 or crisscrossed in the back
or switch it up a bit and crisscross it in the front

Here's a wider piece of lace (contrasting fabric would be pretty too) again in a halter style, but without the gathers.

 Ribbon is an easy addition.  You can use it in a lot of the same ways that we just looked at with the lace..
simple straps
 halter style

Really, the possibilities are endless!  Depending on the fabric and style of the dress, you should be able to come up with something the compliments and enhances the design, while at the same time adding a little more coverage or support.

Is there any method you have used to put straps on a dress or top?  Please share!

Saturday, September 29, 2012

Make It Last

Today's "Sewing School" topic is Modesty.  Most of us probably have a shirt or dress that we like, but aren't quite comfortable wearing because it is a little too low, or a little too short, etc.  Here are a few things you can do about it...

Length
We've talked about this one before - you can simply add length to anything either by letting out the hem or with a contrasting panel or ruffle.  For example, this dress
was much too short, but gained new life with a 5" ruffle.

Bust
This can sometimes be a difficult area, especially if you are nursing!  It sometimes seems to be that I am suddenly overflowing all my tops!  If you're like me, you just wear a tank top under everything, but sometimes that's a pain.  So here are a few ideas...

Add a ruffle (you probably know by now how much I love ruffles!)
like I did with this dress
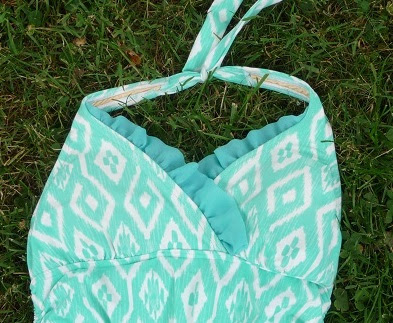
 and this swimsuit


add a panel
gathered like this dress
 or just flat, like this


Anyway, that's all I have for tonight.  Tomorrow I'll show you some ways to add straps to a strapless dress.  Think beyond spaghetti straps!

Wednesday, September 26, 2012

just a few minutes

I had about a 1/2 hour today while the kids were all happily coloring (and would be just as happy to color each other and the table/walls/etc if left alone for a minute).  Dinner was already in the crock pot, and there was nothing I really had to do.  So I cleared a little space for myself in the corner of the table, where I could keep an eye on the aspiring Van Goghs, and turned on the sewing machine. 

I've been wanting to try a "flutter sleeve" shirt for a little while, and I had this polo Steve gave me that he got from a vendor ...  So I gave it a try.

What do you think?  Like it? Ugly?

I tried a few embellishments to liven up the plain camel color...
 a matching fabric ruffle

 a brown flower pin...

 some sparkly beads...

I think I like it.  Unfortunately, as you can see, it fits Cordelia just perfectly, which means there's no way it will fit me (since I have given up hoping to ever be back to my "pre-baby" size!)  So, if I want one for myself I am going to have to find a bigger polo.


It was really simple, in case you want to try your own.  It really did only take about 20 minutes.

How I Did It
Start with a knit shirt.  The larger the shirt, the wider a flutter sleeve you can get.  Cut it off across the chest and along the underarms.  Cut high enough that you get a nice slope to the "shoulder".  I cut it as high as the button placket would let me.  Then cut down the side seams.  Make sure it is symmetrical.
Pin your shoulder seams, right sides together.  Mark 8" across the top, to leave open for a neck hole (For about a size 2/4.  Add another couple inches for a bigger size.)  Be sure you have your opening centered!  Sew from the edge to the marking on each side, using a 1/2" seam allowance.

Turn the shirt right side out and mark your side seams.  I just held it up to the model and marked where I thought it would fit snugly.  Be sure to keep the seams symmetrical!  The should start to slope out at the arm, and end right under the arm.  Sew along your markings.

Trim the "flutter" sides to get a nice smooth edge at the bottom, tapering out from your seam.  I think I should have tapered this a little more.

That's all!  The knit edges don't have to be hemmed, which makes it a little more "flow-ey" and there's already a nice hem in the bottom to hold the shape.


Tuesday, September 25, 2012

let's cook something

Awhile back we were renovating the church's nursery.  Our budget was small, but we wanted a nice play kitchen - one that would really hold up to heavy use.  I saw some ideas on Pinterest for turning an old entertainment unit into a play kitchen, and we thought we'd try it!

I found an old entertainment unit at a yard sale for $10.  It was solid particle board, and probably weighed 400 lbs!  It was really ugly, but seemed sturdy, so (with the help of 4 men) I brought it home.  Everyone from our Bible study group pitched in with labor, odds and ends of leftover paints, old hardware, etc.  A few minor changes in the shelving and doors and lots of paint later, we had a beautiful kitchen that the kids love to play with!  All for next to nothing!

I wish I had some before photos to share of the awful old cabinet, but never thought about it.  However, you've probably seen a hundred old entertainment units before.  And here are the finished photos!
 Everything you could want in a kitchen!

  We cut a hold in the particle board behind the sink and covered it with a poster, so the light would shine through like a real window.  Some baseboard around it looks like a window frame, and a curtain rod with curtains completes the picture.

 The "sink" is a basin from the dollar store, with an old faucet behind.  The cooktop and oven just took a little black paint, some old cabinet knobs and a handle, and a few cds for burners.  We switched the hinges on the oven door so it would open down, like a real oven.  A little magnet at the top keeps it up.

 A little shelf with pot holders hanging from it (Goodwill) and a phone add nice touches.

 fridge and freezer

 The unit orignally had cabinets on both sides with shelves.  the one on the left we removed, and use that little inset as a "broom closet", complete with apron, brush and dust pan, and vacuum.
 The other cabinet we kept for our pantry. 


And there's the completed project!

Sunday, September 23, 2012

Sewing School: Alterations

Today we're going to take a look at 2 basic functions for "making it last" -- Taking In and Letting Out.

First, Taking In.
How many times have you found yourself with a shirt that you really liked, but it was a bit baggy?  Well, there is a very simple fix for that.  (This same trick works with pants and skirts as well.)


Try on the garment (in this case a wonderful, cozy sweater  that just needed a little more shape) and decide how much it needs to come in at the sides.

Turn it inside out and mark.

Sew.  I took mine in by 1" at each side.

 You can see the new seam line 1" to the inside of the old.  In this case the underarm and arm needed to come in also, so I just continued the seam all the way past the elbow and then tapered it back to the original seam.  Most of the time, if a shirt is baggy, it needs to come in under the arm as well as along the side.  With skirts, you can often just take in the side seams along the waist and hips, and then taper back to the original line.  Just make sure you keep both sides the same.


Trim the excess fabric away.

Overcast the raw edge.

Wear and enjoy!

Letting out can be accomplished also very simply, by adding a fabric panel along the side seams.  Once again, this can be done on any kind of top - woven or knit, as well as pants or skirts.

Start by deciding how much extra room you need.  My shirt needed another inch at the sides.

Turn the garment inside out and trim off the side seams.  (If you're cutting jeans, watch out for the grommet you often find at the corners of the pockets!  Trying to cut through that will ruin a good pair of scissors.)

Cut a strip of fabric that is 1/2" wider that the amount you needed to add, and 2" longer than the side seam.

Pin and sew the strip to one cut edge, right sides together.  Open it up and pin it to the other cut edge, right sides together, being sure to keep the hems in line with each other across the new strip.
 
Overcast the edges.

Make a rolled hem at each end by fold the raw edge over, then folding it over again to match the rest of the hem, completely covering any raw edges.  Topstitch it in place.

Press and wear!

Keep in mind that oftentimes adding a contrasting fabric is better than trying to match the fabric - even with a perfect match, it can make it look like you just needed a little extra room.  (This may be harder to pull off with boy's clothes - try a canvas or corduroy) With the contrast, it looks like a deliberate part of the design!  And you don't have to keep knits with knits - a small strip of a woven material works just fine in a t-shirt.