Showing posts with label refashion. Show all posts

Wednesday, January 30, 2013

Refashion - dress from what?

After all that fun making dresses for the girls I didn't want to be left out.

The Tuesday before Christmas Steve and I were invited out to dinner - a grown up dinner, with no children!  (Well, the baby is still nursing every 2-3 hours, so he had to come, but he sleeps pretty much the whole time) And that afternoon when my mother's helper came, instead of doing any of the 2,001 things I needed to get done before we left for Christmas, I decided to make myself a new dress.
Out of an afghan.

It was something someone had made for us as a wedding gift, but Piper (our 220 lb lab mix) had used an edge of it as a chew toy one time, and I have never been sure of what to do with it.  I didn't really know how to fix the edge (have a mentioned that I cannot crochet?) and I didn't have the heart to just throw it out.  So it's sat around for the last five years, mostly being used by the kids to make tents.
And that day I figured, "what's to loose?"
a puppy's work
I really wasn't sure what it would come out like when I started, but I rather like it.  With knee high boots and a pretty scarf?  Unfortunately, after finishing it and trying it on that afternoon, I realized that there was no way I could nurse in it, short of taking the whole thing off, and so I didn't get to wear it that night after all.  Oh well, one of these days...


Instead of bothering with a pattern, I first cut the muslin slip and basted it together to be sure I had the fit I wanted.  Then I marked the few changes I wanted, and took it apart and used it as a pattern on my afghan. 
It was a really simple pattern - just 4 pieces, so it went together really quick.  I will say that cutting that blanket made a lot of fuzz everywhere!  I was finding it for weeks.


What do you think?

 with a belt?


back view

I still haven't worn it.  Maybe next winter when I'm not nursing anymore.

Wednesday, September 26, 2012

just a few minutes

I had about a 1/2 hour today while the kids were all happily coloring (and would be just as happy to color each other and the table/walls/etc if left alone for a minute).  Dinner was already in the crock pot, and there was nothing I really had to do.  So I cleared a little space for myself in the corner of the table, where I could keep an eye on the aspiring Van Goghs, and turned on the sewing machine. 

I've been wanting to try a "flutter sleeve" shirt for a little while, and I had this polo Steve gave me that he got from a vendor ...  So I gave it a try.

What do you think?  Like it? Ugly?

I tried a few embellishments to liven up the plain camel color...
 a matching fabric ruffle

 a brown flower pin...

 some sparkly beads...

I think I like it.  Unfortunately, as you can see, it fits Cordelia just perfectly, which means there's no way it will fit me (since I have given up hoping to ever be back to my "pre-baby" size!)  So, if I want one for myself I am going to have to find a bigger polo.


It was really simple, in case you want to try your own.  It really did only take about 20 minutes.

How I Did It
Start with a knit shirt.  The larger the shirt, the wider a flutter sleeve you can get.  Cut it off across the chest and along the underarms.  Cut high enough that you get a nice slope to the "shoulder".  I cut it as high as the button placket would let me.  Then cut down the side seams.  Make sure it is symmetrical.
Pin your shoulder seams, right sides together.  Mark 8" across the top, to leave open for a neck hole (For about a size 2/4.  Add another couple inches for a bigger size.)  Be sure you have your opening centered!  Sew from the edge to the marking on each side, using a 1/2" seam allowance.

Turn the shirt right side out and mark your side seams.  I just held it up to the model and marked where I thought it would fit snugly.  Be sure to keep the seams symmetrical!  The should start to slope out at the arm, and end right under the arm.  Sew along your markings.

Trim the "flutter" sides to get a nice smooth edge at the bottom, tapering out from your seam.  I think I should have tapered this a little more.

That's all!  The knit edges don't have to be hemmed, which makes it a little more "flow-ey" and there's already a nice hem in the bottom to hold the shape.


Sunday, September 2, 2012

Fall dress

I visited my "refashion" pile this week, looking for something that seemed like autumn, and wound up with this little dress for Ailidh.
She loves it.


Here's the original skirt. When I found it this week, I loved the fall colors.  I don't remember where it came from - it was a size 16 and the lining was torn in several places.  I think that I meant to cut it down to my size and repair it.  But it seemed to be asking to be turned into a dress.

 About an hour later, and there it was!  (I ended up changing my mind a couple times as I was making it, but later on I can share a rough idea of what I did, in case you'd like to make one of your own.)

  Perfect for sitting.

Or spinning.

Or chasing shadows...


 I had a tiny bit left over, so of course I couldn't waste it.  I made it into a little infant dress, simply adding some elastic that I had.

Friday, July 27, 2012

Day Five

Today's the last day of t-shirt week.  It's been a lot of fun, but it's time to move on.

For my last project I decided to try an apron.  Here's how it turned out -


Here's How I Did It:
You'll need a long sleeve tee to get enough fabric for the straps.  Alternatively, you could you 2 different shirts.

Lay the shirt out with the back up.  Cut the top straight across.

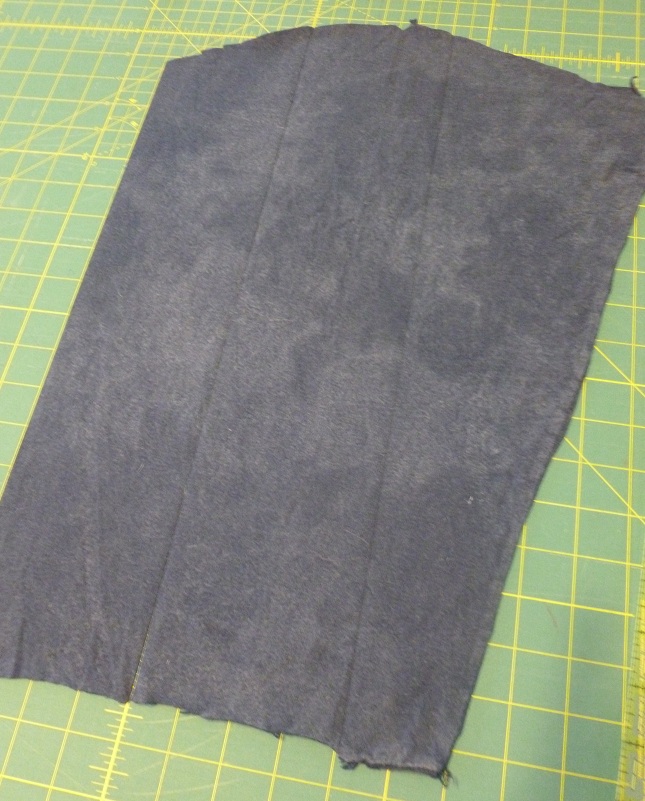
Draw out the curve you want for the apron skirt, and cut it out, being sure to make it symmetrical.  Don't cut through the front of the shirt!

Turn the shirt over and draw another curved shape for the apron bib, with the logo where you want it.   Cut it out also, making sure the sides are symmetrical. 

Cut the remainder of the shirt into 2" strips for the ruffle.  4 should be plenty, depending on the size of the skirt and how full you want the ruffle.

Cut off the sleeves and cuffs.  Cut the sleeves into 4" strips for the straps.  You will need 5.

To make the bib a little stiffer, I traced my bib onto the leftover from a different t-shirt and cut that out as well.

Sew the 2" strips end to end, to make one long strip.  Trim all the seam allowances very close to the stitch line.  Put a line of gathering stitch along one side.  (On most machines, if you turn the tension all the way up it will automatically gather the fabric as you sew.)

Pin and sew the ruffle all the way around the curved edges of your apron skirt.  Press the seam allowance toward the skirt and topstitch all the way around.

 For the straps:  Sew 3 4" strips end to end to make the long waist strap. 

Fold the other 2 4" strips lengthwise and sew right along the edge.

Turn right side out and press.

Fold the long 4" strip in half lengthwise also, and sew it closed, leaving a small opening in the middle for turning.  Turn it right side out and press.

 Lay the back bib piece right side up, and place the shorter straps with the open ends up, along the seam line in the top corners.  Lay the front bib piece right side down on top, matching all the edges.  Sew around the outside, leaving the straight side open for turning.

Turn it right side out and press.  

 Topstitch all the way around the bib.


 Mark the center of the bib, skirt, and long strap with a pin.

Pin all three together, matching the centers.  Have the raw edges of the bib and skirt overlapped behind the waistband.

Sew a double line of stitching along the edges of the waistband, firmly attaching the skirt and bib, and sewing over the little space you left open to turn the waistband.

 Go put it on!