Showing posts with label how I did it. Show all posts

Wednesday, October 3, 2012

new from old

I've had a plastic wipes box floating around in my car for awhile.  The hinge-thing on the lid was broken, so wipes inside always dried up and I never used it.  Well, last weekend Steve cleaned out the car and I was about to tell him to throw it away, when it occurred to me that it was just about the right size for a pair of scissors.
Now, I often carry my scissors and other sewing supplies with me.  Call it obsessive, (Steve does), but sometimes I go to sew at a friend's, and all those things tossed in my purse just seem to stay there.  So I'm always prepared, right?
The downside is, you never know what might poke you when you reach for the keys, and things can be awfully hard to find jumbled up with my wallet, lipstick, a stray diaper, and who-knows-what-all-else...

So, I decided to turn that little wipes box into a "sewing kit".  Take a look!

fits right inside my purse

 holds everything I might need, and nothing can get lost!

it even looks cute - what more could I want?

How I did it

Start with one of those plain little solid plastic wipes boxes.  You know - the "diaper bag size" ones.  Peel off any labels.

Go ahead and glue the lid shut.  I used a little hot glue.

Now, open the box and lay it upside down,  Brush one half with modpodge and the cover it with a piece of cloth.  Make sure it is laying flat and smooth.  You may have to work a bit to get those corners.   Trim the extras around the edges.  Do the same on the other half.
 Brush another layer of modpodge over the fabric to seal it.  Don't worry too much about the edges and corners, we'll come back to them.  The fabric should overlap a bit at the hinge.  Make sure there's enough room for the box to close!

Let it sit to dry for an hour or two - until the modpodge is still soft and a little sticky, but not dry.


 Go back and make a couple cuts at the corners, then lay the fabric flat.  You can use a little more modpodge to get it to stick.  Now is also a good time to make sure the cut edges are really smooth and straight, and brush more modpodge over any fabric that doesn't seem to be sticking tightly. 

Let it dry overnight.  You're done!


Wednesday, September 26, 2012

just a few minutes

I had about a 1/2 hour today while the kids were all happily coloring (and would be just as happy to color each other and the table/walls/etc if left alone for a minute).  Dinner was already in the crock pot, and there was nothing I really had to do.  So I cleared a little space for myself in the corner of the table, where I could keep an eye on the aspiring Van Goghs, and turned on the sewing machine. 

I've been wanting to try a "flutter sleeve" shirt for a little while, and I had this polo Steve gave me that he got from a vendor ...  So I gave it a try.

What do you think?  Like it? Ugly?

I tried a few embellishments to liven up the plain camel color...
 a matching fabric ruffle

 a brown flower pin...

 some sparkly beads...

I think I like it.  Unfortunately, as you can see, it fits Cordelia just perfectly, which means there's no way it will fit me (since I have given up hoping to ever be back to my "pre-baby" size!)  So, if I want one for myself I am going to have to find a bigger polo.


It was really simple, in case you want to try your own.  It really did only take about 20 minutes.

How I Did It
Start with a knit shirt.  The larger the shirt, the wider a flutter sleeve you can get.  Cut it off across the chest and along the underarms.  Cut high enough that you get a nice slope to the "shoulder".  I cut it as high as the button placket would let me.  Then cut down the side seams.  Make sure it is symmetrical.
Pin your shoulder seams, right sides together.  Mark 8" across the top, to leave open for a neck hole (For about a size 2/4.  Add another couple inches for a bigger size.)  Be sure you have your opening centered!  Sew from the edge to the marking on each side, using a 1/2" seam allowance.

Turn the shirt right side out and mark your side seams.  I just held it up to the model and marked where I thought it would fit snugly.  Be sure to keep the seams symmetrical!  The should start to slope out at the arm, and end right under the arm.  Sew along your markings.

Trim the "flutter" sides to get a nice smooth edge at the bottom, tapering out from your seam.  I think I should have tapered this a little more.

That's all!  The knit edges don't have to be hemmed, which makes it a little more "flow-ey" and there's already a nice hem in the bottom to hold the shape.


Tuesday, July 10, 2012

Fabric wrapped wire letters

 Remember this? 

 It's the wire name I made to hang in the nursery.  I'll have to admit that it's one of my favorite creations.  Since then I've made a dozen or so for friend's babies.  It's a great way to use up some scraps, give a personalized gift, and show some creativity!  Look at all the letters you can make! 


Want to try making one?

 How I did it:
Start with 2 lengths of floral wire, (20 gauge) side by side.  Wrap them with stem wrap (the slightly stretchy, sticky tape that florists use on corsages). If you're working with the pre-cut lengths rather than a roll, you will probably want to add a few more lengths to the end, wrapping all the way down. 

Now, cut 1/4" -1/2" strips of fabric and wrap them around the wire.  Use a little hot glue to keep the beginning end from unraveling.  The sticky stem wrap will hold the fabric in place nicely.  When you've gotten enough of one color, add another by tieing the two ends together.  Keep wrapping until the entire wire is covered.

On a large piece of scrap paper, write out the name that you want to create, the actual size you want it to be.  (If you're really free-spirited, feel free to skip this step and just start bending!)  Place the wire over the cursive, and start bending it to match the letters.  Play around with them until they look the way you want them to.  Go ahead and hot glue the wires together where they overlap, to make the name a little more sturdy.  Also, glue the fabric twists down anywhere you cut the wire, to keep it from unraveling. 

Here's the really fun part - start embellishing!  I have used silk flowers, feather butterflies, cork birds, plastic bugs, lace, rhinestones, and buttons.  You can make it masculine for a little boy, or as girly as possible -whatever your heart desires!

Wednesday, February 15, 2012

Good-bye, winter blues,


hello spring-time blue!

     It seems like we're just on the verge of spring here.  One day it's cold and grey, the next we're tantalized by a blue sky and soft breezes.  I am tired of the same old sweaters all the time, and I think the kids are too!  So I decided to make something a little bit more "spring-ey" for Ailidh. 


            I started with an old sweater of mine.  This sweater has always made me feel a bit dumpy.  Which, after 3 children, I need no help with.  So, instead of leaving it in the back of my closet forever, I decided it would be the perfect new spring item for my daughter.

(Actually, it doesn't look so bad on Cordelia, but that is because 
she's about 3 sizes smaller than my post-three-babies body!) There is also a real belt, 
but at the time of this photo it was being used as a leash for somebody's teddy bear...


    A couple cuts and a half an hour later (when I really should have been starting dinner for my family...), and I had a cute little sweater vest.


 How I did it:

I folded the vest in half and cut off about 4" from the side.

      Next I pinned up the new sides, leaving about 5" for a new arm hole, and about 6" at the bottom for the slits.  A quick seam, and then I overcasted the armholes, and made a tiny rolled hem along the slits at the bottom, and it was pretty much finished. 

         I still had the belt, so I cut it in 4 equal pieces and attached them about 3" back from the side seams, directly under the arms, and tied little bows.  That also helped give it a little more shape.
Then, because it kept slipping off her shoulders, I also added a little hook and eye in the front.

All finished!

Sunday, February 12, 2012

a sudden fancy

After Bible study the other night, with the kids tucked safely in bed, I started pulling out my sewing materials to work on my dress (for about the 20th time).  As I was hunting for various objects I needed to begin laying it out, I started thinking about Ailidh.   Because who can stop thinking about this adorable little face!
 

More specifically, thinking about her coat.  It's been getting a little tight, this is definitely the last winter she'll be able to wear it.
     "Yes," I thought as I looked for my large shears, "she'll need a new one next year.  I wonder if I could make her one with something I already have.  Maybe a heavy sweatshirt."
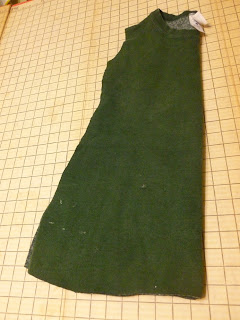
      Then, as I spread out my pin board, "I have that old green sweatshirt.  I could play around with that and see how it comes out, then if I don't like it, I'll just throw it out."  So, again (for about the 20th time) I pushed the still uncut wool suiting aside, and pulled out an old sweatshirt and a pile of scraps.

      It's a pity, that wool really will make a nice dress some day.   But I must say, I think her new coat is awfully cute.  If only it didn't have holes and paint splatters all over it....


 How I Did It:

Here it is, more or less...
Start with a sweatshirt.

Fold it in half, and cut the appropriate shoulder width, down the side, leaving a curve for the arm, and tapering out toward the bottom.
 Cut down the front fold line, cut off the collar, and cut a gentle rounded shape.  Sew the new side seams.
 Take the old sleeves and cut a shoulder curve at the side near the cuff.  Cut the other end off at about the right length.  You can always cut it shorter after you try it on.
 Mark the waistline, and put a line of gathering stitches along it across the back, side seam to side seam.  Make a belt (I used scraps from Steve's old jeans!) and sew it down along the waist.  If you want ruffles around the neck, just fold a strip of fabric (twice the length of the neckline, from the belt) in half and gather the raw edge.  Attach it to the neckline.
Add snaps to the belt to close the coat, and any embellishments you want!


 Go play!


 And then, because after all, it is supposed to fit her next year, James sweetly volunteered to try it on.  In exchange for a candy...
He doesn't look quite as swamped as she does. 

     So, the idea was to just use this as a pattern coat and make a new, nice one with something that doesn't have holes and paint splatters all over it.  But we all know that once I've tried something once, I almost never come back to it.

This will probably be what you see Ailidh in all next winter, holes and all.

Unless I come up with another idea!


Saturday, December 10, 2011

Refashion: Team Spirit!

Everyone in our house was sporting orange last week, as Daddy was getting excited for the "big game". 

Everyone, that is, except Ailidh.  Somehow we didn't seem to have any Clemson stuff in a 2T, and the 18m shirt she'd been wearing was just too tight! 

So, I pulled out this 3m onesie that never fit anyone (it was so big across the shoulders and much too short through the snaps), an old orange t-shirt from Steve's drawer, (good ol' t-shirt drawer again!) and about 20 minutes later Ailidh had a brand new Clemson pride dress!


 How I did it:
It was really simple.  The pictures pretty much say it all!