I really don't understand why for so many clothes the only "size" they change for larger sizes is the circumference. The little triangles that are supposed to cover you don't get any bigger, just a little wider! The same thing is true for shoes -- a 4 inch heel is the same 4 inches in a 9.5 as it is in a 6, even though for the size 6 you are practically wearing pointe shoes! Whatever happened to proportions?

Enough of that, and back to the top. So, I bought this top (clearance rack, $1) in a large, thinking that it would cover a little more, but instead all I got was an ill-fitting, indecent shirt that looks cute on the hanger and never leaves the hanger.
Have any tops like that?
Well, I decided to do something about it. Feel free to follow along with your own!
Notwearable to Wearable: Blouse Refashion


I started with the top I liked and dug through my husband's t-shirts until I found one in a coordinating color. I decided that he didn't really need this t-shirt anymore.
Next, I cut the blouse along the waistline, first removing the little bow. After I had the upper part removed, I cut up the side seams, so I had two roughly triangle pieces and a long rectangle. You won't use the rectangle. (I stuck that in my scrap pile, I'm sure I'll find some use for it one of these days...)

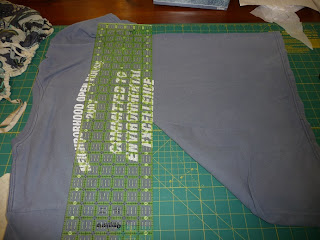
Now, set that aside and pull out your "borrowed" t-shirt. Cut this off under the arms, or as high up as you can get without getting that graphic in there.
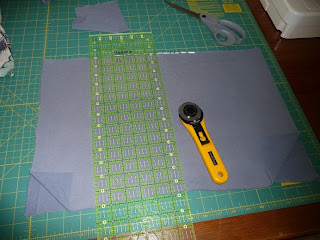
Cut this in half up the middle, and cut along the sides, so you now have 4 large rectangles all the same size
Out of the left-over parts of the shirt, cut two 4 1/2" x 5" squares. These will be your shoulder pieces.
Now, sew two line of gathering stitches along the tops of your 4 large rectangles.
Gather them and pin the along the 4 1/2" sides of your shoulder pieces. Sew.
You should have two pieces that look like this:
Press and top stitch for a neater look.
Now, fold the piece in half along the middle of the shoulder piece, right sides together, and sew up one side of each of these pieces to make your underarm seam, starting at the bottom and sewing towards the shoulder piece; I made mine seam 7" long.
You should now have two bodice halves. Drape these over your shoulders (or those of a handy dummy. I used Cordelia; you could use a friend, or a sister; don't use your husband. You need...well, you know...curves.)
Pin the two halves together in the middle, front and back, overlapping it as much (or as little, but we're going for more modest here!) as you desire.
Now, wrap a tape measure or string around her "waist", just under the bust or wherever you want the waistline to be, and mark this line, pulling the fabric down so it lies nicely over the bust and back, and is gathered under your string. Somehow I don't have a picture of the string on there. The bottom edge will look very uneven.
Mark this line (I used pins because my "helper" had run off with my marking pencil.) and cut off the extra fabric about 1" below your marking.Pin this bottom edge (the two halves of the bodice still overlapping as you pinned them) to the top of the bottom half you cut off the original blouse, right sides together. Sew. Press the seam allowance toward the bodice and topstitch this down 3/4" from the first seam to make a casing; leaving a small opening to insert your elastic.
Wrap a piece of elastic around your waist, just under the bust, stretching it just a bit. Add 2" and cut. Thread this through the casing, overlap the two edges together by 2 inches, sew them together, and let the whole thing pull back into the casing. Finish your top stitching to complete the casing.
You now have a completed new blouse! Time for the embellishments.
Remember those two little triangle pieces you cut off at the beginning? Trim those raw edges so they make a gentle curve from edge to edge.
Now, pin this along the shoulder of your blouse, right sides together, matching the center of the triangle with the center of the shoulder piece.
Sew this down. Press and top stitch for a neater look.
There you go!


v. clever! And nice looking refashion!
ReplyDelete