Saturday, November 12, 2011

Sewing School Saturday - Hems

 I've been without my computer for over a week now, and let me tell you, it's been tough!  I do not think of myself as "technologically advanced".  Quite the opposite.  I have yet to figure out texting, find facebook confusing, and panic whenever anything changes on my email.  Actually I don't really know how I ended up with a blog.
All that being said,   I have felt very disconnected with my world this week!  And I'm very glad to have it back again!

So moving on to today's topic --  
Hems

         There are about as many methods of hemming as there are seamstresses.  We're going to talk about 3 different kind of hems:
Straight hem 
Blind hems
Curved hems


 Straight hem.  This type of hem is commonly found on pants, straight cut skirts, and other sporty items.  You can make this any width, really, the most common being a 1" hem (in the example) or 1/2".
Start by marking the length of your hem.  Add 1 1/2", and trim.  Place the fabric wrong side up.  Press over 1/2" along the edge to be hemmed. 
Note on marking hems:  The item to be hemmed should always be marked ON the person or object it is intended for!  If you're making yourself a skirt, have someone else mark it while you wear it.  The easiest way is by using a stiff ruler and measuring up from the ground, so that it is even all the way around.

 Press over another 1", completely covering the raw edge, and pin in place.

Topstitch 7/8" from the folded edge. 


 Blind hems.  These are often done on dressier items - dress pants, drapes, etc.  You will need a blind hem foot for your machine.

Start by marking your hem and pressing over 1/2", then 1", as in the straight hem.  Instead of topstitching, however, you will fold this to the outside (without pressing), about 1/8" down from the inside pressed fold edge.  

 Put the unpressed fold along the metal guide of your blind hem foot.  Set the machine on the blind hem stitch.
 Start stitching, checking to be sure your fold is the correct amount.  The zigzag stitch should just be catching along the unpressed fold.
 When you reach the end of the hem, unfold it and press it flat.  You should see a zigzaggy pattern on the inside.

On the outside you should just be able to see tiny little vertical stitches.  Almost invisible!

Curved hems.  Curved hems (such as you would find on A-line, bias cut, or circle skirts)  require a little extra care, since the inside edge of your fold is shorter than the outside.  Start by marking the hem, adding 3/4", and trimming away the extra fabric. 
Note:  ALWAYS remember to hang your project for at least a week to allow the fabric to give and stretch before marking your hem.

Run an easing stitch (the longest stitch length on your machine) 1/2" from the raw edge. 

Press the edge to the inside along this line. 


Trim the folded edge to 1/4"
 

 Fold and press again 1/4" to the inside, covering the raw edge.  Pin in place.  Use the easing stitch to gently draw in the fabric as needed to get the hem to lie flat.
 

  Topstitch this in place (an alternative would be to blind hem by hand, but I don't have the patience for that!).  You should now have a nice, neat, curved hem!


Friday, November 4, 2011

Family Fall Photos

So, this has nothing to do with crafts.  But here are (in my opinion) the cutest kids in the world!


You know you're a crafter when...

I teach a sewing class most weeks, which is a lot of fun.  Steve, however, has started referring to these classes as "how she supports her habit"  which has gotten me thinking about my obsession with crafting. Fortunately he loves me anyway. 

You may also have a problem if any of these sounds like you:

You cut up a brand new sweater to see if you can turn it into a purse.

Your kids start crying when you mention you'd like to stop at the fabric store "real quick".

Your craft supplies and fabric stash takes up more room than all 3 of your kids clothes.  Put together.

You see something in a store and think "$150!  I could make that.  Probably better."

All your friends think there is something a little odd about you.

The craft store is it's own category in the family budget.

Words like "thread race", "gather" and "rotary cutter" are in your 3-year-old's vocabulary.

You feel guilty buying yourself the new boots you've wanted for 2 years, but you think nothing of spending $35 on materials for a new dress for your 18 month old, which she won't wear more than twice, IF it turns out the way you want!

Wednesday, November 2, 2011

First Birthday!


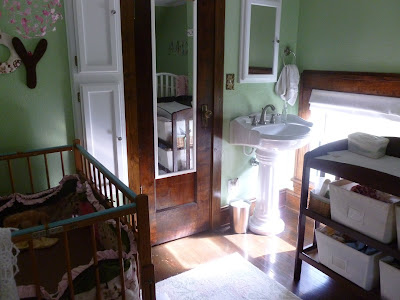
 Last week was Joy's 1st birthday!  I wanted to share some photos of the finished nursery, but first I have to share these birthday cake pics!


 What could be more fitting for an October birthday than a giant pumpkin cake?  (I am NOT a professional cake decorator by any stretch of the imagination.  Somehow that is one of my mother's talents that I never inherited.  Remind me sometime to share photos of the gorilla cake that Grandma made on James' last birthday.)

Joy, however, was impressed

And thoroughly enjoyed it!


Moving on to the nursery....
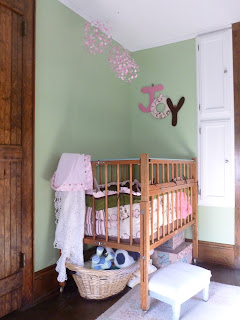
I was able to repaint this weekend while Steve's mom was here to entertain kiddos.  I found a king size brown sheet set on clearance for $18, which I used for new sheets for both cribs, as well as slipcovers for the rockers.  I would've spent that on 1 crib sheet!  I love the new colors in there - it looks so soft.
So, here are the photos.  Tell me what you think!

 
             the antique switch plates my Grandfather gave us
                                                          
the little doll I made when I was a child

the fall view out the window


Ailidh's bed


 her name
 

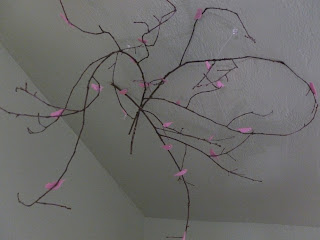
and her mobile


 Joy's bed, and her name
 

 and her mobile
 "new" brown rockers


 Joy's quilt, finally finished!


Right, so that's what it looked like yesterday.  Here's what it looked like today after naptime (during which Ailidh was obviously not "napping" at all!)


 Yes, that's baby powder.  
                         Everywhere.
     See all the little footprints in it?  What you can't see is how she took all the books off the top shelf of the bookcase, dumped them ALL in her sister's crib, then climbed up in there and gotten herself stuck.  Oh well, at least it smelled nice.


 Happy Birthday Joy!